Repainting your kitchen cabinets is one of the most cost-effective ways to transform your kitchen without committing to a full remodel. A fresh coat of high-quality cabinet paint can modernize outdated wood tones, brighten a dark space, or introduce a bold, on-trend color in just a few days of focused work.
But repainting cabinets is not just about applying paint. The durability and final appearance depend heavily on preparation, product selection, and proper curing time. This guide walks you through how to repaint kitchen cabinets step by step, along with expert tips to ensure your results look intentional, smooth, and long-lasting.
Should You Repaint, Reface, or Replace Your Cabinets?
Before opening a paint can, make sure repainting is the right option for your kitchen.
When repainting makes sense
Repainting is ideal if:
- Your cabinet boxes are structurally solid
- The layout of your kitchen works well
- Doors and drawer fronts are in good condition
- You want a cost-conscious upgrade
Solid wood or high-quality MDF cabinets typically repaint well, especially if the existing finish is stable.
When repainting may not be enough
Repainting may not be the best choice if:
- Cabinets are swollen from moisture damage
- Thermofoil is peeling
- Doors are warped
- You dislike the cabinet style or layout
If you’re unsure whether repainting is worth the effort or if upgrading makes more sense, consulting a cabinet-focused company like Kitchen Search can help clarify whether your cabinets are strong candidates for repainting or if replacement options would better serve your long-term goals.
Tools and Materials You’ll Need
Quality materials directly affect the final result. Cutting corners here usually leads to peeling, chipping, or visible brush marks.
Essential tools
- Screwdriver or drill
- Labeling tape and marker
- Drop cloths
- Sandpaper or sanding sponge (120–220 grit)
- Vacuum and tack cloth
- High-quality angled brush
- High-density foam roller
Must-have materials
- Degreaser or heavy-duty cleaner
- Wood filler
- Caulk
- Bonding primer
- Cabinet-grade paint (acrylic enamel or alkyd hybrid)
Wall paint is not formulated to handle the wear and cleaning demands of kitchen cabinetry. Cabinet-specific products are engineered for durability.
Step-by-Step: How to Repaint Kitchen Cabinets the Right Way
Step 1: Prepare your workspace
Remove items from cabinets and clear countertops. Lay drop cloths and ensure good ventilation. If possible, create a separate area where cabinet doors can dry flat.
Step 2: Remove doors, drawers, and hardware
Take off all doors and drawer fronts. Label each one and its corresponding hinge location to avoid confusion during reinstallation. Store hardware in labeled bags.
Taking photos before removal can help during reassembly.
Step 3: Clean thoroughly
Kitchen cabinets accumulate grease that prevents paint from adhering properly. Use a degreaser to clean all surfaces, even if they appear clean. This step is critical.
Allow surfaces to dry completely before sanding.
Step 4: Repair and sand
Fill dents or scratches with wood filler. Once dry, sand all surfaces to remove gloss and create texture for primer adhesion. You don’t need to remove the entire finish, just scuff it enough for bonding.
After sanding, vacuum thoroughly and wipe down with a tack cloth.
Step 5: Apply bonding primer
Primer ensures paint sticks and prevents stains or wood tannins from bleeding through. Use a high-adhesion primer designed for cabinets.
Apply a thin, even coat and allow it to dry fully. Lightly sand between primer and paint coats for a smoother finish.
Step 6: Apply cabinet-grade paint
Use thin coats rather than thick ones. Apply at least two coats for proper coverage and durability.
When using a brush and roller:
- Use the brush for corners and detailed areas
- Roll flat surfaces with a foam roller for a smoother finish
- Avoid overworking paint once applied
Allow each coat to dry as directed by the manufacturer.
Step 7: Allow proper curing time
Paint may feel dry within hours, but curing takes much longer. Avoid heavy use for several days and treat surfaces gently during the first week.
Step 8: Reassemble and adjust
Once cured, reinstall hardware and doors. Adjust hinges to ensure alignment. This final step significantly impacts the polished look of your project.
Choosing Paint, Sheen, and Color in 2026
Selecting the right finish affects both appearance and longevity.
Best paint types
Acrylic enamel and alkyd hybrid paints are popular for cabinet projects because they offer:
- Hard, durable finishes
- Smooth leveling
- Resistance to moisture and stains
Best sheens
- Satin: Modern, forgiving, easy to clean
- Semi-gloss: Durable and slightly more reflective
High-gloss finishes show surface imperfections more easily and require near-perfect prep.
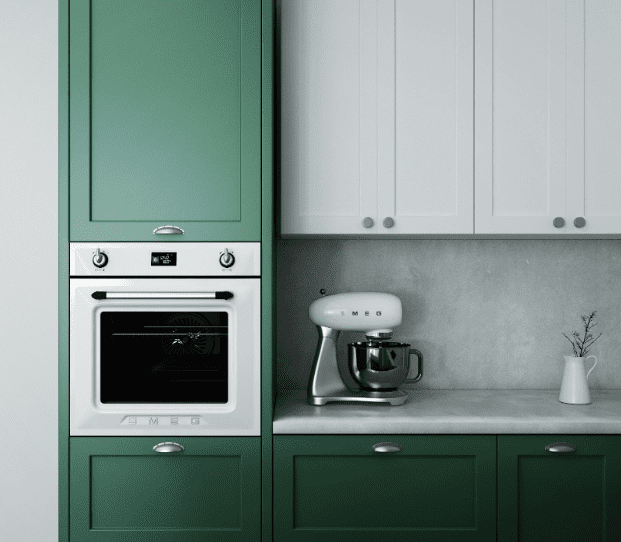
2026 color trends
Recent trends favor:
- Warm whites instead of stark white
- Soft greiges and creamy neutrals
- Muted greens and earthy blues
- Two-tone kitchens with contrasting islands
When repainting, choose colors that complement countertops and flooring to avoid clashing elements.
Common Mistakes That Ruin Cabinet Paint Jobs
Even careful DIYers can run into problems.
Skipping degreasing
Grease residue causes peeling months later.
Using the wrong paint
Standard wall paint lacks durability and may chip quickly.
Rushing the curing process
Reinstalling doors too soon can cause sticking and surface damage.
Ignoring failing materials
If cabinet surfaces are deteriorating, paint will not fix underlying structural issues.
Brush and Roller vs. Sprayer: What Should You Use?
When spraying makes sense
Sprayers can deliver a factory-like finish, especially on flat-panel doors. However, they require:
- Controlled workspace
- Proper masking
- Experience to avoid drips
Getting smooth results without spraying
Most DIYers achieve excellent results using a high-density foam roller and quality brush. Light sanding between coats improves smoothness significantly.
If your goal is a dramatically upgraded look and you’re debating whether repainting or replacing doors would achieve better results, Kitchen Search offers cabinetry solutions that can help homeowners evaluate whether refinishing or upgrading cabinet doors is the smarter investment for their space.
Maintenance Tips to Protect Repainted Cabinets
Once your cabinets are repainted, maintain them properly.
- Clean with mild soap and water
- Avoid abrasive pads
- Install hardware to reduce direct hand contact
- Address moisture issues promptly
Keeping surfaces dry and clean will extend the life of your finish.
Conclusion
Learning how to repaint kitchen cabinets can save thousands compared to a full remodel while still delivering impressive visual impact. The key to success lies in thorough preparation, using the right materials, and allowing proper curing time.
If your cabinets are structurally sound, repainting can dramatically refresh your kitchen. If you discover that the cabinet boxes, doors, or layout are no longer working for you, exploring replacement or upgrade options may provide a more lasting solution.
With careful planning and patience, a cabinet repaint project can completely redefine your kitchen’s look and feel.